Inspired by the assault scenarios: I thought I’d use some leftover styrofoam and have a quick go at some fortifications. Here’s how it happened:
Stage 1:
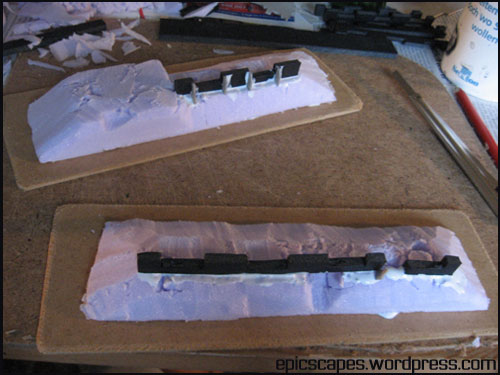
Thin board bases, shaved and sculpted styrofoam hills, foamcard walls and cardboard buttresses were glued together. The transition between base and hill looks crap in this phase, but will be filled with putty or samesuch.
The model at the top will get a bunker at the left end, the lower piece will hopefully look as if a massive explosion has taken a chunk out of the wall.
Stage 2:
The cracks and patterns in the rock face were done with a soldering gun. Models were evened out with filler putty and given a base coat. To the side you can see defensive walls about which I might post a few more pictures in the future.

Stage 3:
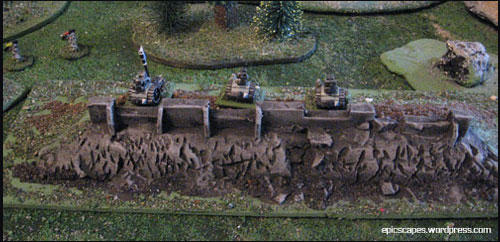
You can see the finished fortifications here. Two layers of drybrushing in grey and white to pick out the details, afterwards flocking the base with colored sand (we have our own special mix of grey and green sand that corresponds to the colour of the table). The first has a bunker with removable cover that protects 2 infantry stands. The damage to the bottom one didn’t turn out as nice as planned, but that can still be corrected later.

We haven’t fixed the cost for these assault scenario pieces yet, but we feel they should be costly since we’re talking 20cms of protective wall each here, and on elevated ground as well.


Leave a comment